Sunday, September 30, 2012
Sunday, September 9, 2012
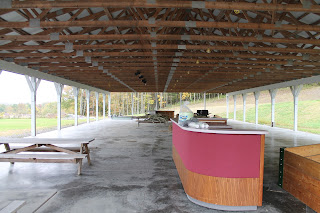
Fall Party Planning Pic's
Hang lights in the pavillion
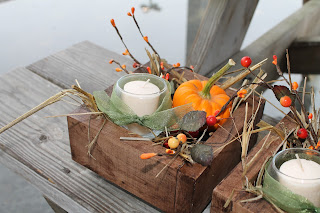
With Apples too! Would like something this shape but can use center pieces I made too
Source: bunchesandbits.blogspot.com via Tracy on Pinterest
Wednesday, March 21, 2012
Monster Box
This was a fun craft I found on Pinterest.
I thought thought they were really cute. I didn't really have a purpose for it afterward but it was something that me and my little girl got to do together and it was fun!
Here is our creations.
We use shells for eyes with some paper for eye lashes and teeth and I little bit of acrylic paint for the base and puff paint for a little something extra.
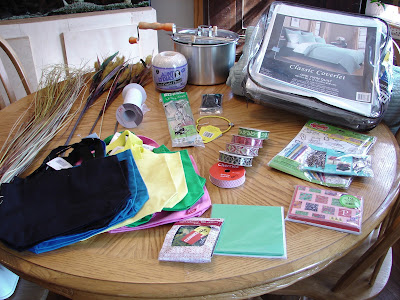
I also have to share with you my great bargain find! I went to a garage sale at a house a few blocks from my. These guys most now some tricks because he had bins and bins or crafts supplies and a lot of over stuff for .10 to .25 each. This is what I bought for $7.50.
Not to bad right?
Tuesday, February 28, 2012
Bottle Cap Magnets Tutorial
I got some bottle top magnets for Christmas a few years ago that I really liked. I'm not sure why it took me this long to do it myself but I finally did. Here's how I did it.
Supplies:
Bottle Tops
Magnets
E9000
Cardboard
Patterned Paper
Glue Dots
Mod Podge Dimensional Magic
then used that to cut out more cardboard and patterned paper pieces. Make one cardboard piece and one patterned paper cutout for each bottle cap you have.
I used two glue dots stacked on top of each other in the center of the inside of the bottle cap and then pressed the cardboard on top of that.
I put another glue dot in the center of the cardboard.
Then pressed the patterned paper at the top of that.
Coat the top of the patterned paper with a layer of Mod Podge's Dimensional Magic. I did about an 1/8 of inch layer, let it dry for 3 hours and then because I wanted to make the bottle cap look more full, I did another layer. Make sure to get rid of any bubbles, a tooth pick or safety pin is a good way to poke them out. If you wanted you could also just stack up more cardboard paper and use less Dimensional Magic.
After it totally dries, I used E9000 glue to attach the magnet.
Voila, it's complete. These are really quick (minus the waiting time), easy, and cheap to make.
Monday, February 27, 2012
Save the Jar
I don't know about you but I have a ton candles in these glass jars. So I decided, why throw away the jars if I could clean them out nice and use them for something else. Lately, I''m really into saving things that at first glance look like garbage. Egg cartoons, toilet paper rolls, tissue boxes and know candle jars. So this is how I cleaned it out. Burn the candle until it can't burn anymore, put it into the freezer for a couple of hours, after you take it out use a butter knife or screw driver to crack the wax. After that you should be able to easily get the wax out, then just wash the jar with a little soap and a sponge, don't forget to clean the lid too.
Now you have endless uses for this cute little jar. Here's just a few idea's I pulled off of Pinterest.
Saturday, February 25, 2012
No Tangle Headphones
I found this great idea for "No Tangle Headphones" on Pinterest. Cute right?
Well I have a lot of this string, from way back in 4th and 5th grade when I had a bracelet making "business". I was so cool! I've held onto the string all these years, used it a little bit for some free-hand cross stitching but other then that it's gone pretty much untouched. So I thought this would be a good opportunity to use some of it up, not to mention I hate having to untangle my headphone every time I go to use them.
It's a pretty easy project, if you use to make friendship bracelets (no matter how long ago) it comes back to you like riding a bike. You can go to this blog to get a tutorial, Crown Hill. The string she used is a little different then mine. Mine string is the kind you find in the cross stitching isle. I think you probably have more options as far as color in that type of string, but her's seemed to work really well and looks great too. So either one works. I was working with left-overs and didn't have a lot of one color, so I decided to do mine in multi-color.
Like I said it's really easy, but it is a long task. I just put on some TV and got to work. It took about maybe 4 hours, I broke it up into two days. Oh and I used a jaw paper clip, clipped to the jack of the headphones and my shoe to hold it into place.
Thursday, February 16, 2012
Here are some projects I would like to work on sometime in the near future. I would much rather be working on them, then only writing about it but sometimes this is all I can do.
So I really like these bags. I think I would like to do them in the exact same colors. There is just something so peaceful about the color and texture combo. I'm also really into stenciling fabric with ink right now.
I love this patch work on torn jeans. My daughter recently got a bunch of hand-me-down jeans from her cousins with a couple that have little wholes in the knees. I'm looking forward to doing this to them. Maybe I can find a way to "girlie" it up a little. If not I would still love to do it.

So I really like these bags. I think I would like to do them in the exact same colors. There is just something so peaceful about the color and texture combo. I'm also really into stenciling fabric with ink right now.
Source: seekatesew.blogspot.com via Tracy on Pinterest
I love this patch work on torn jeans. My daughter recently got a bunch of hand-me-down jeans from her cousins with a couple that have little wholes in the knees. I'm looking forward to doing this to them. Maybe I can find a way to "girlie" it up a little. If not I would still love to do it.

I would like to make a trash for my car like this. I think I could use a waterproof washable fabric.
I really want to make this. I would change it just a tiny bit so it makes sense in my family, but I love it.
Sunday, February 12, 2012
Valentine's Day Hairband
This image I found on Pinterest inspired me to try and make my own version of a Valentine's Day Hairband.
I fit a piece of elastic to Ella's head, cut it, and sewed it together at the ends.
Cut 6 hearts of difference sizes out of felt. Double up on the hearts and sewed them long the center of the elastic band spaced out a little bite. This craft took seriously 10 minutes.
I have to tell you I wore in when we went out to lunch today and it pretty cute. So it's not just for kids!
Subscribe to:
Posts (Atom)


