
This is a project that I am considering doing with my MOPS group. I've made them before but don't take any photo's. You can find these tutorials many places, but I like that think I add a little bit of my own style to them.
Materials:
- Clothes Pins
- Scrapbooking Paper
- Ribbon
- Mog Podge glue (I use the orange and yellow bottle)
- sponges brush applicator
- E6000 Glue
- Flat back Crystals
- Sand Paper
- X-acto Knife
- Sticky back magnets
Remove one side of the clothes pins.
Sometimes this can be a little tricky, but if you pull the clip open a little
and wiggle it, it should come out.

Put a coat of the Mod Podge (I use yellow) on the back side of the scrapbook paper and outside of the clothes pin. Then line the glued sides together.

Use the X-acto knife to cut around each clothes pin.

Get out the sand paper and sand the paper around all the edges. Make sure to sand off any edges of paper hanging over (I sand also to give a distressed look).

Finishing Coat. I use the orange bottle of Mod Podge to apply a finishing light coat on the paper (I apply two light coats in a criss-cross with about a minute in between coats, for a textured look).

For a little embellishment, I used a small dot of E6000 on the top end of the clothes pin (the side that you pinch to open). Place a flat back crystal in the glue.


Cut a 5" piece of ribbon and tie them around the pin just under the crystal and put the
clips back together (once again this can be tricky).
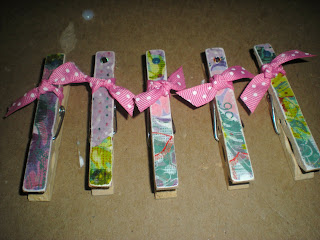
Last but not least, take you magnets, remove the paper and attach the magnet to the top backside of the clothes Pin. I've use the magnet tape because I'm looking to use this for my MOPS group and it keeps the costs down, but if your looking for these to have a strong hold then I'd use the round disc magnets.
Then place into your newly made "light box" for a final picture and......Voila!


No comments:
Post a Comment